Friday, November 8, 2013
10 Tips On Shooting Your First Wedding
While my previous entry on "8 Tips on Preparing to Shoot Your First Wedding" dealt with the necessary preparations for a photographer before the wedding, here are a few tips on actually shooting your first wedding.
1. Limit Flash Use
Your pictures will look more realistic if you limit your flash use so try to limit its use as much as possible during ceremony. A higher ISO or aperture value may be needed although sometimes you can’t get away from using Flash if there is really no light to work with. Try to be respectful once they are on stage but remember you are there to capture and document the wedding. Ask the bride and groom if there are any flash restrictions as some churches do not allow the use of flash.
2. Shoot in RAW Mode
I know I have said it before but shooting in RAW mode gives you a lot of room to tweak your images after the wedding. Just don’t give someone a DVD with the photos you took. You need to go through each one of them and adjust them accordingly for proper white balance or exposure or any other number of things. Maybe some of them will work better in black and white. Point is, don’t give them out without “developing” your photographs first.
3. Know the Parts of the Ceremony
Most weddings have the same parts and last about as long, but discuss with the bride and groom to identify if there are changes from a traditional ceremony. This will allow you to know where to stand and take pictures and know what details to capture. You have to recognize when the end of the ceremony is coming so that you can move at the end of the isle.
4. Shoot a Lot.
Shoot more than you think you will need. Each person that is included in the picture is another pair of eyes that can blink. You should set your camera for continuous mode or burst mode.
5. D Is For Details
Don’t forget to capture the details. Some of those details may have been handmade and taken hours to create. The couple would definitely want to remember those. Also try to be creative you don’t want your photographs to look like Uncle Henry’s who just purchased an entry level DSLR.
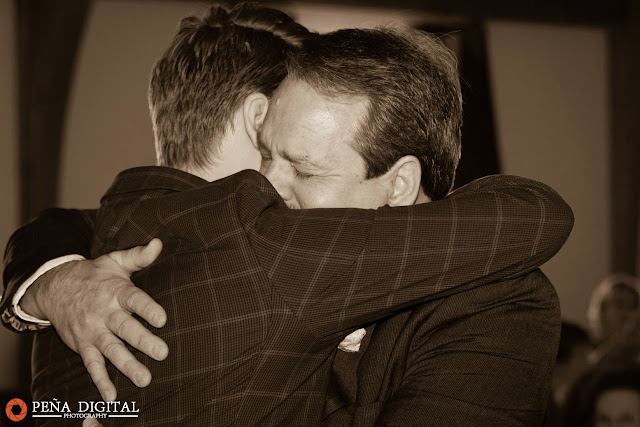
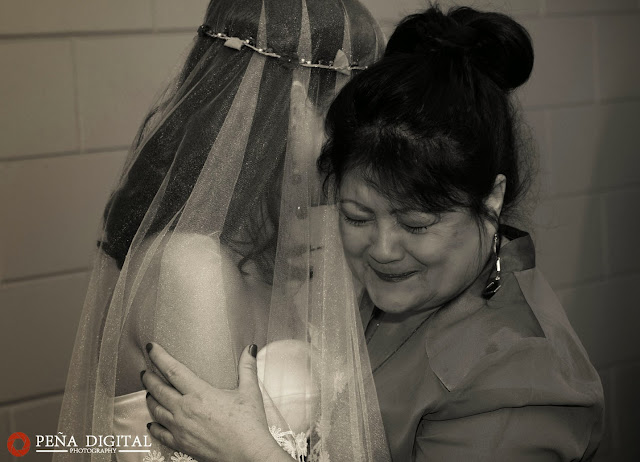
6. Capture Emotions
This is what will get people to remember the moment. If they look at your photograph and can say.. “I remember what I was feeling at that exact moment.” You did your job. You are having someone re-experience their emotions on a specific moment in time and that is very powerful. Sometimes these moments last but a few seconds so you have to be ready and know your camera like the back of your hand.
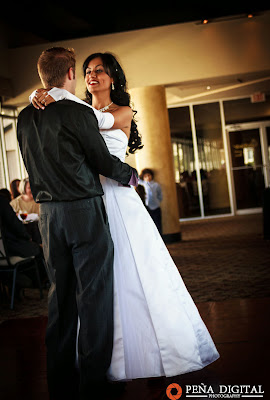
7. Don’t Move Around During the First Dance
Exercise patience. They will eventually spin around and will give you different perspectives as they do.
8. Smile
If you are smiling you become more approachable and people will not fear you. They will also be more relaxed in your presence and you will be able to take more candid shots. Don’t keep the camera in your face all day. Weddings are supposed to be a party, have fun shooting and smile. Remember, it is an honor for you to be shooting at their wedding.
9. Lean on Me
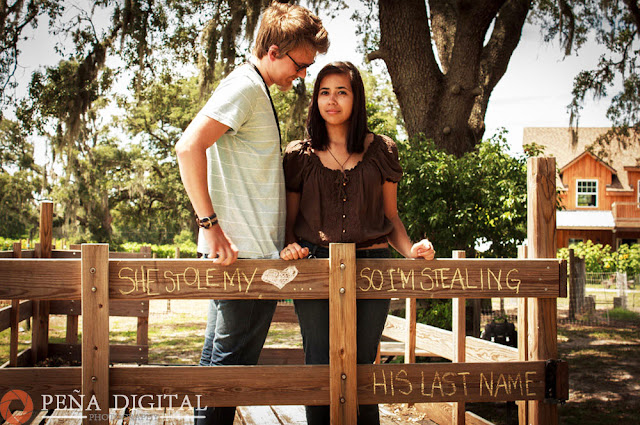
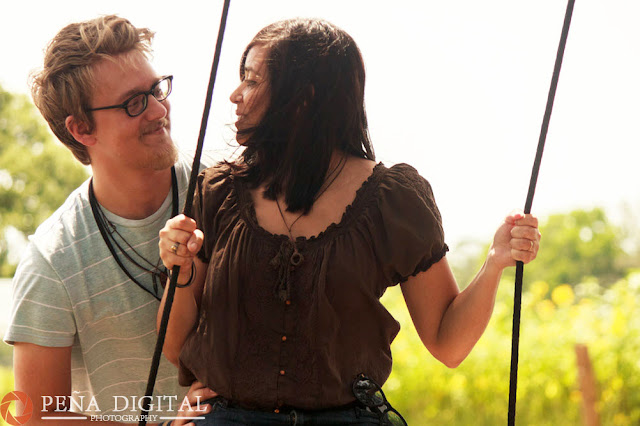
Have the couple leaning into each other, touching or almost touching. Always try to have them leaning into each other to convey a sense of love. People who hate each other usually try to stay far away. You don't want that look in your photographs. Keep this in mind for any portrait work you do.
10. Leave in Good Terms
Always a good idea to contact the bride and groom before leaving and ask if there are any extra shots they would like. Aunt Edna may have made it to the wedding after all and she was not part of the shot list.
If after you are done the couple or one of the parents of the couple come up to you and tell you that "You were Awesome! You were all over the place!" or "You did a great job." Its great. They haven't even looked at the pictures yet but they saw you working all day. You had your camera in your hand and you were snapping away when you saw something worth capturing. Trust me, people will notice.
Monday, October 28, 2013
8 Tips On Preparing Yourself To Shoot Your First Wedding
Sooner or later is going to happen. If you are serious about your photography, a friend or family member is going to ask you to be a photographer at their wedding or even be a backup photographer. How do you prepare yourself for shooting a wedding? Below are a few tips that will hopefully help you get started.
1. Check Out The Location
Churches and other wedding venues can sometimes present tricky lighting situations. If you’re an amateur photographer get yourself acquainted with the location and take some test shots weeks prior to the event date. You may notice you will need to purchase additional equipment that will help you in your shoot. A professional photographer can virtually walk into any room and within minutes know how to shoot in that specific location and they have plenty of equipment to meet and photograph in almost any situation.
2. Create A Shot List
Sit down with the couple and decide on a shot list. With a hectic day it is easy for the couple to forget who they want a photograph with. It is up to you to remind them of a particular photograph with a relative they had previously requested. Here is a sample shot list.
3. Early Bird Catches The Worm
Be at least an hour ahead of schedule. You can start taking pictures of details, of the venue and other ideas that you can use later. Plus it gives you a chance to set up and test out your equipment to make sure everything is working correctly.
4. Take Extras Of Everything
For weddings you should take extra memory cards, batteries for both your camera and speedlights (flash) and even have a backup camera if possible. Have all your batteries fully charged. Remember this is someone’s very special and important day. If your camera runs out of battery how can you explain that to the bride and groom?
5. Get Familiar With The Couple’s Family
Early in the event you will need to know who the bride and groom’s family members are. You will then know which people to keep a closer eye on. You may ask the bride’s or the groom’s mother for information if you are unsure.
6. Dress Appropriately
This almost goes without saying. Try to fit in with the rest of the crowd and dress as the other guests. Use your best judgment. Remember you are selling a product and part of that product is your image.
7. Clean Your Camera's Sensor
If you've been taking pictures for a while, and have never cleaned your camera's sensor, chances are that your camera's sensor is dirty. Many DSLR's camera sensor will automatically shake now and then, when you power off the camera to try to clean itself but sometimes a little more help is needed. Cleaning the sensor is easy and takes but a few minutes at most. If you don't feel comfortable doing it take your camera to a professional to get it cleaned. A clean sensor will get rid of some speckles of dirt found in your photographs.
8. Research
The internet is an amazing place to look up other wedding photographers and to look at their portfolios online. This will give you some knowledge on common shots and poses as well as get you in the right state of mind to come up with your own. Wedding magazines are another good source to conduct your research. When you look at those photographs try to think on how the photographer took the shot. Where is the light coming from? Is it soft ambient light, like that of a window or flash? What made the shot? Why did you like a particular photograph?
What are some of your key preparations for a wedding shoot?
Monday, July 29, 2013
5 Tips On Shooting Engagement Pictures
Engagement pictures are usually taken several months before the wedding and are a great time to test the chemistry between the photographer and the couple. For the couple it is a good way to spend some quality time doing something fun and it allows them to practice in front of the camera, getting to know their photographer, hopefully calming some of the nerves down before the big day. For the photographer, it is a perfect way to engage with the couple and covey the trust they are seeking. The goal as a photographer is to make the couple feel at ease and comfortable during the shooting session.
The images from the engagement session are sometimes used by the couple for their "Save the Date" invitations or they can be printed for display at their wedding reception. So they are still important for the couple.
Here are my top 5 tips for shooting an engagement session.
1. Connect With The Couple
Being a wedding photographer requires you to have personal skills. You need to be able to connect with the couple and talk in a way that makes them feel comfortable. You will need to direct the couple to pose and work with you. Not too much directing, its more of you observing the light and if there is unflattering light, telling them to stand in a certain position, or look to the side and let them take it from there. Remember that these are not professional models. Encourage them by telling them that they are doing well and occasionally show them the LCD in the back of the camera so that they see for themselves.
One easy way I have been able to do this is by asking them questions. Ask them about their wedding details or how they met. How did he proposed? Keep the conversation going. They will start to open up to you.
2. Capture The Romance
Try to shoot images that have the couple heads as close as possible, leaning in towards each other, communicating and sharing with one another. Closeness conveys a deep emotional connection and it is this connection that you want to capture. You want to be able to capture the romance in the pictures.
3. Know Your Equipment
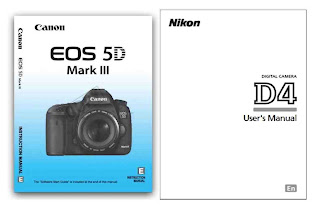
Have you read your camera's manual front to back? There is important information that is covered in that little book and you need to learn how to change settings in your equipment almost as a second thought. The amount of things your camera can do is truly incredible. Take the time to read the manual.
One setting that comes to mind is continues focus mode vs single focus mode. Most times, during an engagement shoot, the couple will be standing or sitting still, posing. You can break that by getting them to move and putting them into action. You may want them to be walking towards you or away from you on a sidewalk. One reason why you would want to have this kind of shot is because the couple does not have to think about posing and it gets them to engage in a different way.
The easiest way to accomplish this shot is to set your camera to continuous focus mode. You will need to change your camera's setting to shoot in continuous mode. In continuous mode the camera will need to focus on different planes of field very quickly. You can use this mode to let the camera do the work. In Canon cameras this is called AI-Servo and in Nikon it is called AF-C mode. I would also recommend the use of a telephoto lens where most often times the lens used is a 70-200mm lens. You also want a quick shutter speed, something about 1/200th of a second or faster, to minimize shutter blur. So again, you will need to change a setting in your camera.
4. Shoot in Continuous Mode (Burst Mode)
This is related to number 3 but I thought I would mention it here. Continuous mode will let you fire multiple shots when leaving the shutter button pressed. Depending on your camera the amount of shoots per second will vary. The reason for shooting in this mode is because people make facial expressions or blink. When shooting a couple that factor is now multiplied by two (either person can blink). The difference can be remarkable in snapping an image with just half a second a part.
5. Use Off Camera Flash
If you leave the speedlight on the camera pointing directly against the couple, you will have harsh light on their faces creating very unflattering light. Instead, bounce the light against a wall or ceiling if you can. If you are shooting outdoors bring an assistant to help you carry a light stand with a speedlight and umbrella or softbox kit. If you don't have someone to help, trigger the light kit setup using a wireless trigger.
The photograph above was shot using a flash attached to a light stand with a softbox located on the right side.
Bonus Tip: Always Shoot In RAW
Future brides have enough stress, your work can bring reassurance that they picked the right person for the job. A great way to do this is with exceptional post-processing of your RAW files.
There is so much more you can do after you snap your pictures in post-production if you have a RAW formatted file to work with than a jpeg file. A RAW file captures all image data recorded by the sensor when you took the picture. You will be able to adjust your images to a higher level of quality than you would be anle to with a jpeg file. Jpeg files are only 8 bits while RAW files are as high as 14 bits, so you can imagine the amount of additional information that is captured.
Saturday, July 13, 2013
University Of Tampa Bay Photo Shoot
Recently, I had the opportunity to photograph one of the most picturesque universities I have ever seen, the University of Tampa, located in the heart of downtown Tampa, FL.
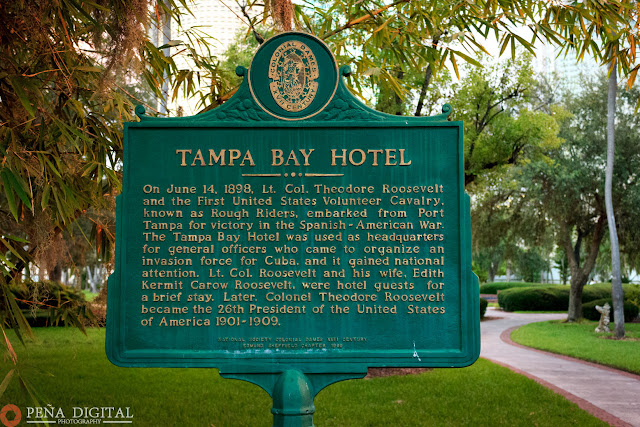
The university used to be a hotel in the late 1890's. Class sizes must not be big as each classroom is the size of a normal hotel room.
Close up of one of one of the minarets. It is beautiful to see them at night when they are all lit up.
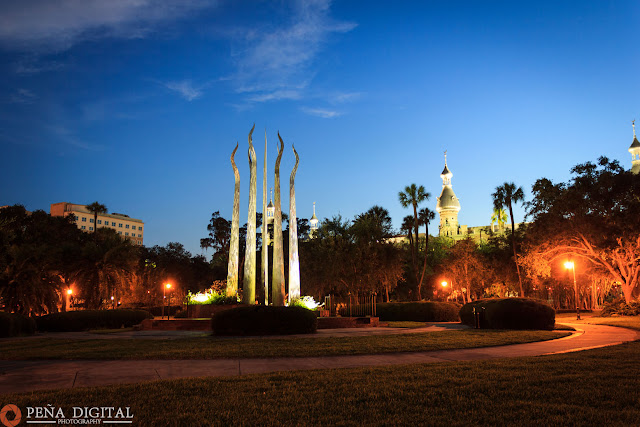
It does have some beautiful gardens and different sculptures throughout.
I spent several hours photographing different areas of the university. It really is a very nice place to visit and shoot some photographs.
Sunday, June 30, 2013
HDR Photography
 |
HDR stands for High Dynamic Range and is a process used in producing an image that overcomes the limitations of today's digital cameras. It is not a new process. It was actually used as early
as the 1850s by a photographer called Gustave Le Gray.
It can be used during those times when the camera is not able to capture the full range of contrast in a scene. When taking pictures of a scene with a great dynamic range it is not possible to
correctly expose for both the highlights and the shadows. The problem is that if you expose for the highlights, the shadows will lose all the information as you might only see black and will add noise. If you expose for the shadows, your highlights will be burn out and you will lose information
as you might only see white.
What if instead you take multiple pictures, exposing for both highlights and shadows and merge them together? That is what HDR accomplishes. Through the use of software, HDR exposes for both highlights and shadows in a single image.
Cameras can only see and capture about 5-7 exposure values. Our human eyes can capture about 12. With HDR you can make your images look the way the scene looked when you were exposing the picture. Anyone can apply this process to their images. Keep in mind that you will still need to start this process with a good image. This is not a process for making bad images look good. A bad image is still a bad image but it can make a good image look its best.
HDR images are usually composed of three images. One at normal exposure (EV 0), one underexposed (usually at EV-2) and one overexposed (usually at EV+2). Some photographers take at many as 5 to 7 pictures with different exposure values. I find that most of the time this is not needed.
Below are the the three exposure images used to merge the HDR file at the beginning of the blog entry.
The Equipment You Will Need
To capture true HDR images you will need the following equipment. Later on I will show you a way to cheat and create HDR images with only one picture.
2. Tripod - You want to capture multiple images of the same scene, therefore the use of a tripod is a must.
3. Cable release or remote - You want to avoid camera shake. Using a shutter cable release or remote will be best. If you don't have a cable release you can use your camera's timer.
How To Shoot Your Picture
STEP 2: Use the lowest ISO possible. The idea is that you want to try to minimize noise and since you will be using a tripod you don't need a high ISO. I normally set my to 100.
STEP 3: Use aperture priority (Av or A) mode.
STEP 4: Turn off auto focus. Auto focus has a gyro inside that is going to vibrate. The less vibration you have in your camera the better the images quality when merging together.
STEP 5: Turn off image stabilization. Since you are using the tripod this is not needed. In fact, having it on might increase vibrations.
STEP 6: Shoot in RAW mode. This will capture the most information in every image.
STEP 7: Shoot at aperture f/8. If you can, shoot at this aperture value to get a very sharp photograph. Most lenses will be sharpest at this aperture setting.
What To Shoot
- Another possibility is to shoot at night.
- Shoot objects with a lot of textures.
What Software To Use
Here is a list of the most popular software products used to create a HDR image.
- HDR Efex Pro
- Adobe Photoshop CS6
- Adobe Photoshop Elements 11
- Topaz Adjust
Cool Trick for Creating HDR Effect
If I want to create an HDR image and I did not shoot bracketed images, I will create the additional images in Adobe Lightroom. With Lightroom, I will select the image I want and save it and then overexpose it by +2 and underexpose it by -2 and save both of those images as well. Now I have 3 images with different exposure values to create my HDR.
The Topaz software mentioned above does the same thing automatically. You simple select the image you want to use and it will automatically convert it to HDR. That is why it is called psedo HDR.
Here is a picture where I had to create the overexposed and underexposed images because the darn pelicans would not stand still, no matter how many times I told them not to move.
Obviously there will be times like these where your subjects will be moving and you will not be able to capture three images that are alike. You may see this if you are capturing an image of a tree for instance. Where the tree leaves will move due to wind.This is called ghosting. In software like Photomatix you can select the area where ghosting takes place and the software will choose only one of the exposures to use for that particular area. If you are using Adobe Photoshop or Elements you can select the photograph which you want to appear in your final image and just create a layer mask.
Thursday, June 13, 2013
Enhancing A Landscape In Post-Production
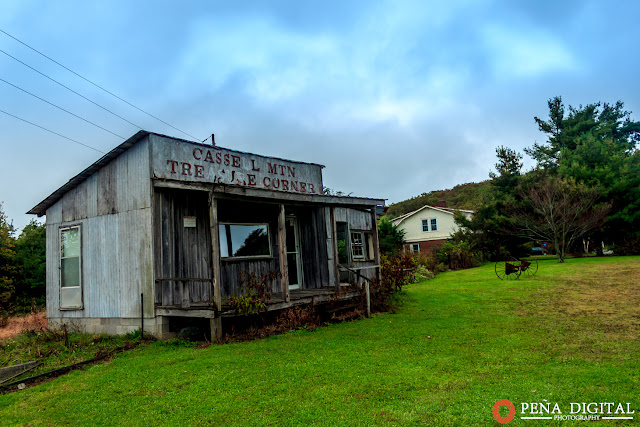
Sometimes composition is not easy. You may not be able to take a photograph of your subject during perfect lighting conditions. Such is the case during a family trip to the mountains of Virginia. I was only in the mountains for a brief period of time on a overcast and rainy day. The light reflected from the gray clouds made everything look dull. Nevertheless, I saw an interesting looking house that had potential, but there was no good angle to photograph it. There was a road with signs on the left and a house on the right that took away from the rustic look and feel.
STEP 1: Post-Production In Lightroom
I played around a bit with the photograph in Adobe Lightroom and was able to add more warm colors to the original image, as it was a RAW file. I even added some fake clouds in the sky. I liked what I saw, it was a big difference from where I had started. The colors now popped but I was still not satisfied.
STEP 2: Finding And Adding Elements To The Photograph
I found an image of two trees online that more or less resembled the trees during fall that I saw during the trip to the mountains. I extracted the trees from their background using Adobe Elements, but this could easily be done in other image editing software like Adobe Photoshop or if you prefer in GIMP which is free. I then added the trees to the photograph to hide the white house in the background a little and the other one as a bush to hide the concrete foundation on the side. While I added only two tree to the final image, I did practice adding other kinds of trees.

|  |
STEP 3: Final Tweaks
Just small touch ups here and there to clean the picture. Removing the cables from the top of the house and the fence post from the side using the healing tool in Adobe Elements were a must. As well as getting the added trees adjusted in the right light.
Thursday, June 6, 2013
Selective Coloring Effect Using Lightroom
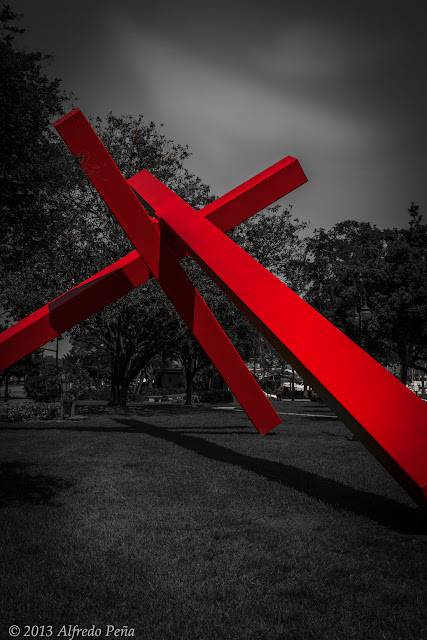
One of the simplest way to add a little spark to a photograph that is highly popular is the use of selective color in a black and white photograph. You may have seen it on wedding pictures where the bouquet of flowers held by the bride is the only object colored in the image.
While there are countless of ways to achieve this type of effect, for this entry I will show you a quick and easy way to do it using Adobe Lightroom 4. The picture below shows the before and after the technique has been used and it only took a few minutes to achieve. The original image was shot at 28mm, 1/200 sec, F/8.0 and ISO 100. I took this photograph while sightseeing in downtown St. Petersburg, Florida.
Lets get started..
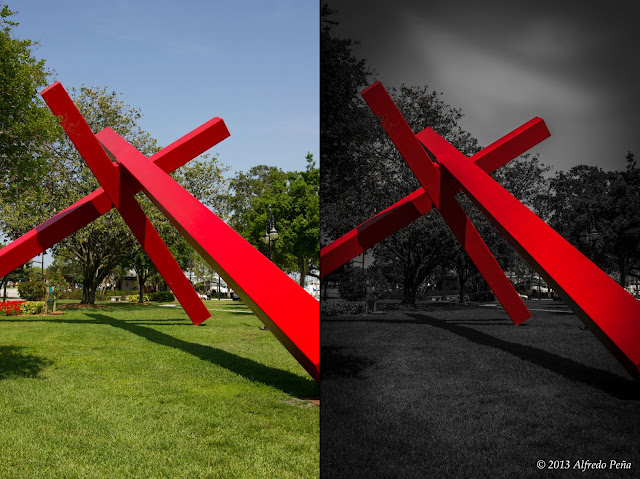 |
| Before and after pictures of selective color example |
STEP 1: Lower Exposure Value
Open the image in Lightroom and under the Develop module select the Basic tab and lower the exposure to -2.0. I find that lowering the exposure for black and white images brings out drama in the photographs.
STEP 2: Add Vignetting
Vignetting is found in the Lens Correction tab. Adding vignetting will lead your viewers eyes to the center of the picture because it is lighter in the center. I set mine to -33 for this photograph.
STEP 3: Change Saturation Levels
Select the HSL / Color / B&W tab. From there select Saturation. With the sliders you can adjust your image to display only the color you want. In this case I left the Red and Orange sliders alone, since those are the colors used in the beams, and the ones for Yellow, Green, Aqua, Blue, Purple and Magenta I set to -100. After this step you are about 90% done. As you can see in the picture below there is red and orange colors in nearby bushes that I still had to remove.
STEP 4: Use Adjustment Brush for Corrections
For removing the color in the bushes I used an adjustment brush. Select the Effect desired to be Saturation and set that to -100. Brush over the areas that contain colors that you do not want to show. If you make a mistake, select the eraser mode and brush over the area.
STEP 5: Use Adjustment Brush for Dogging and Burning
From the early days of photography dogging and burning has been used to add accent and adding pop to black and white images. Dogging and burning simply mean adding highlights and shadows to your pictures. In this case I added a little effect on the sky by setting an exposure of +.50 to an adjustment brush and making lines across the sky several times. Less noticeable, there is also some effects being applied to the grass in some areas and some of the trees.
For taste, I cropped my picture into a square using a crop of 1:1. Here is the final image below.
Saturday, June 1, 2013
Depth of Field
Depth of field is the portion of your image that is in focus. The field is the distance in front and behind your subject that is acceptably sharp and in focus and one of the most creative tools you can use as a photographer.
In the picture below the truck in the middle is the only thing sharp and in focus, inside the depth of field. Everything else, in front and behind, is outside the depth of field.
 |
| Example of Depth Of Field |
Most photography beginners believe this is something complicated to understand and difficult to control. My hope is that after reading this entry you will have a better understanding as to how it works and that you will be able to apply it to your photographs.
A shallow depth of field is when your subject is in focus but the background is out of focus. Since our photographs are two dimensional, this is a way to create a three dimensional feel because you can see the subject forward in the image. You may have seen this effect in portrait photography. Our eyes are naturally drawn to the sharpest objects when looking at an image. With this effect you are removing all distractions in the background, guiding your viewer's eyes to your subject. You let the viewer know what you, as the photographer, consider to be the main point of interest.
A deep depth of field, normally used when photographing landscapes, is when everything in the image, from the foreground to the background is in focus.
What influences depth of field in an image
The depth of field is influenced by three factors: Aperture, focal length and the distance you are from your subject. Lets look at each one of these closer.
Aperture
Having a large aperture (small f-stop value) will have an impact on depth of field. The smallest f-stop value you can set in your camera is determined by the lens you are using. You can set the aperture value in your camera using either Aperture Priority Mode (Av on Canon, A on Nikon) or Manual mode. Don't be afraid to venture into these modes. They will make your pictures look better. For more information on aperture check out my entry on the exposure triangle here.
Here is an example of photographs taken with a large aperture at f/2.8 and another one taken at f/11. As you can see all distractions have been remove in the one taken at f/2.8, while the one shot at f/11 is very distracting with everything in focus. The beach was just as crowded in the second picture. To learn more on aperture read my entry on exposure basics here.
 |
| F/11 - Small aperture |
 |
| F/2.8 - Large aperture |
Focal length
You can create a shallow depth of field with a longer focal length, such as the ones used in a telephoto lens. A telephoto lens compresses the background making your subject stand out from the background. Wide angle lenses expand the depth of an image creating a deep depth of field so it will be more difficult to create a shallow depth of field with a wide angle lens. To do so, you would need to stand very close to your subject. This is why wide angle lenses are most often used for landscapes, when you want everything in the image to be sharp and in focus.
Below are two photographs taken from the same distance of 10 feet. One using a wide angle focal length of 24mm and the other using a focal length of 70mm. You can see the distracting background in the picture shot at 24mm, showing a deep depth of field.
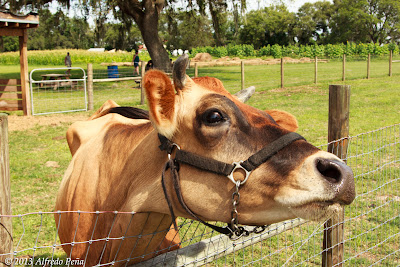 |
| 24mm |
 |
| 70mm |
Your physical distance will have an impact on the depth of field. The closer you stand to your subject, the shallower the depth of field. Take a look at the following images for example.
Below are two photographs were the same camera settings were used, aperture of f/5.6, focal length of 50mm and ISO set to 200. The only difference is that on was taken 10 feet away and the other from 3 feet away. As you can see the one shot from 3 feet away removes most of the distractions with a blurred background. Your eyes automatically focuses on the flower because it is the sharpest object in the frame.
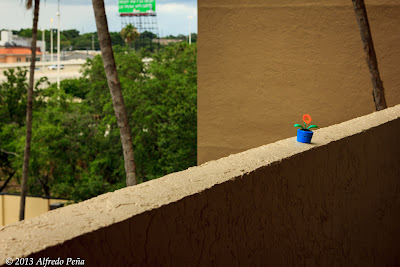 |
| 10 feet away from flower, f/5.6, 50mm, ISO 200 |
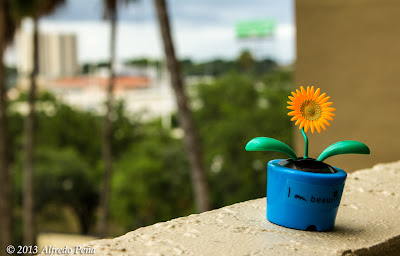 |
| 3 feet away from flower, f/5.6, 50mm, ISO 200 |
Recommendations
- When photographing people and want to create a shallow depth of field, use a wide aperture. Also make sure you focus on the eyes. If the eyes are blurred the picture will be no good.
- When photographing landscapes and want everything in focus, use a high aperture value of f/8 or f/11. These are values where your lens will be most sharper.
Subscribe to:
Comments (Atom)


