There are several ways to set white balance in Adobe Lightroom. If you want to know more about white balance, read my blog entry about it here.
After you have opened your images in Lightroom, select the Develop module to change the white balance setting and use one of the options below.
Option 1
From the Basic menu in the right pane you will be presented with the "WB:" drop down menu when you click on "As shot". Then, select the white balance setting desired.
 |
| White Balance Drop Down Menu |
Option 2
Select the Temp and Tint sliders, also found in the Basic menu. The Temp slider will set the temperature on the image, cooler to the left (blue) and warmer to the right (amber). The Tint will compensate the green and magenta in your image.
 |
| Temperature and Tint Sliders |
Option 3
Also from the Basic menu, use the dropper tool to set the white balance of an image by selecting a neutral color. You will find a neutral color in your image when the values of the three channels (Red, Green and Blue) are almost the same.
 |
| Dropper Selection Tool |
 |
| Dropper Tool |
Example of How To Use Dropper Tool
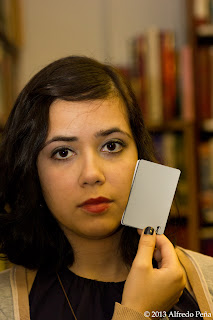
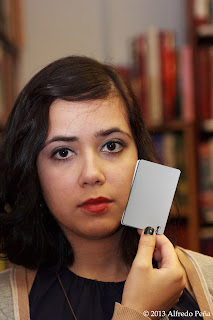
When getting the correct white balance in your images is a concern, you can use 18% gray color cards to help you set accurate color temperature in all your images.
I took the picture below in a very poorly lit library during an engagement session.
 |
| Image looks to yellow without correction |
- Snap one shot with the color card near your subject like you see above.
- Open Adobe Lightroom and import your image.
- Select the Develop module.
- Click on the dropper tool from the Basic menu on the right pane.
- Move the dropper tool inside your image over the color card.
- Click inside the color card when the numbers for Red, Green and Blue are almost the same.
- That's it. Your image will have accurate white balance.
 |
| Image with white balance correct |
- Select multiple pictures and press the "Sync..." button found on the left pane. You won't see it if you haven't selected multiple images.
- The window below will be shown. I would suggest you first click the "Check None" button so that you don't apply any other settings aside from white balance.
- Check the White Balance check box.
- Click the Synchronize button. And Voila... All the images selected have the corrected white balance setting.


No comments:
Post a Comment